With PEP’s library of production rates, you can make a detailed estimate that calculates time and material based on the surface (sheetrock, smooth trim, rough trim, brick, etc), the method you plan to use (brush, roll, spray), the number of coats, the difficulty level, and the height of the work. But sometimes you just need to record a list of labor hours and materials. This is especially helpful if you come across something you don’t have a production rate for.
To help your estimating process go faster, you can make a Time & Materials Form with itemized tasks you frequently do.
Step 1: Decide how you want your T&M estimate to look to clients
There are a few ways to go about setting up a Time & Materials form in PEP. The real difference is how it looks when you present to clients in the proposal. Check out the samples below and then jump to steps #2 and 3 for the option you like best.
Option A – Simple
A list of itemized tasks with one line labeled “materials.” This does not show customers what specific material is being used for each task.
Option B – Use Materials from Your Library
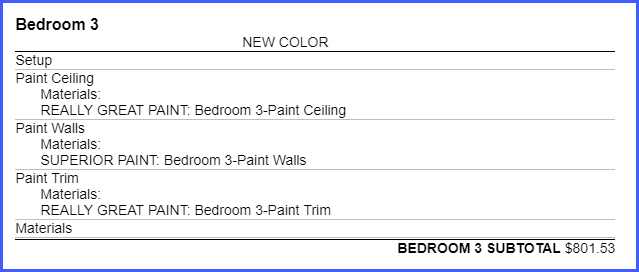
Shows itemized tasks and specific materials within each line item using the Materials Library.
Option C – Note the Material
Make a note on each task line to indicate the intended material.
Step 2: Begin your estimate
Forms are made inside of a job so start by selecting a client and a job, then make a new area and add items.
Note: Time & Materials does not make use of measurements so when creating a new area you can record the room dimensions if you wish, or check “skip this step”.
Step 3: Build your form
OPTION A
A list of itemized tasks with one line labeled “materials.” This does not show customers what specific material is being used for each task.
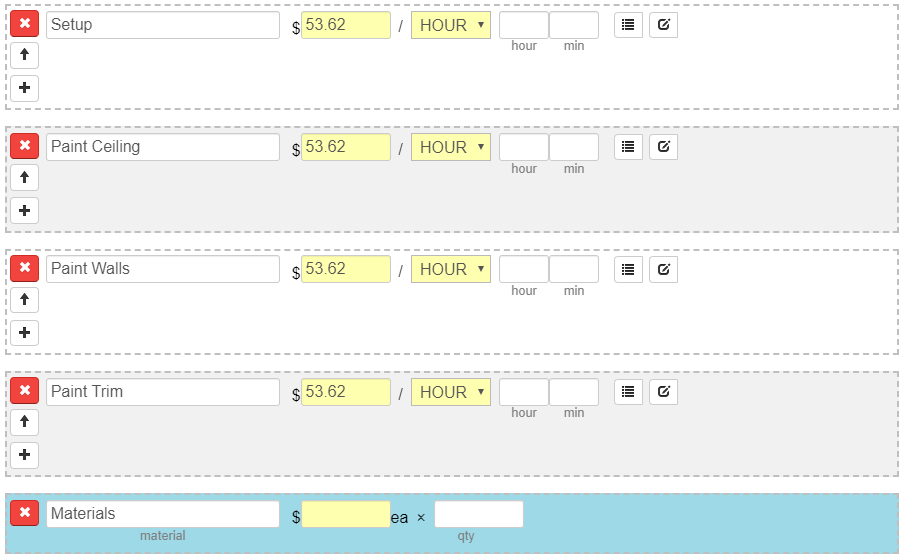
- Click Add “Hourly Task” to manually add hourly items. OR PEP has a pre-saved Time Form called “Prep Detailed”
- Items in the form can be renamed according to your needs
- Enter the number of hours for each item
- Click Add “Materials” to manually add a material and price line to the form
Note: When using the Materials line, you want to include the price you want to charge the customer, NOT the price you pay for the materials.
- Save the edited form
- Click “Save/Edit” at the top
- Name the form
- Click “Save”
- Your form will be saved to the CHOOSE A FORM drop-down menu for quick access next time.
Your form will look something like this:
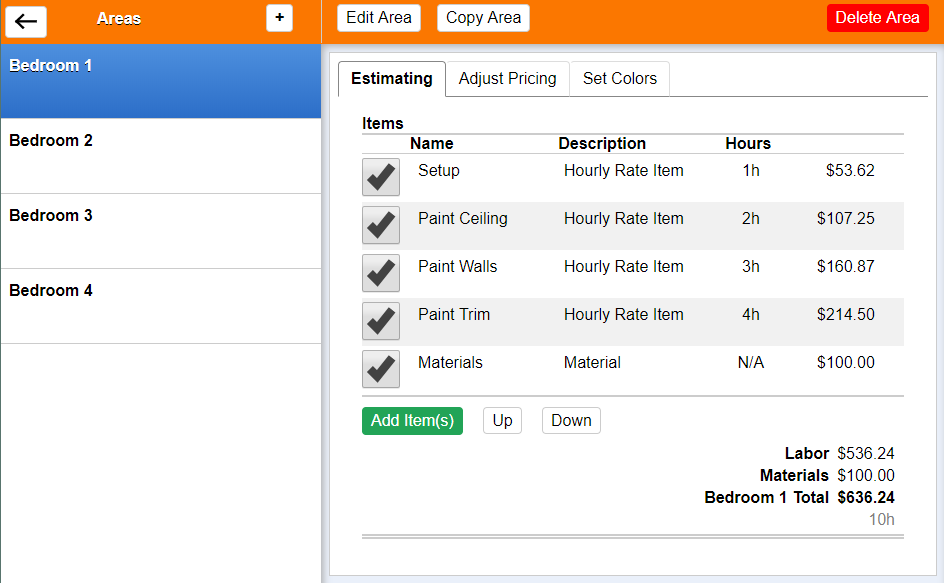
On the estimating screen in PEP, it will look like this:
Option A – Alternate Version
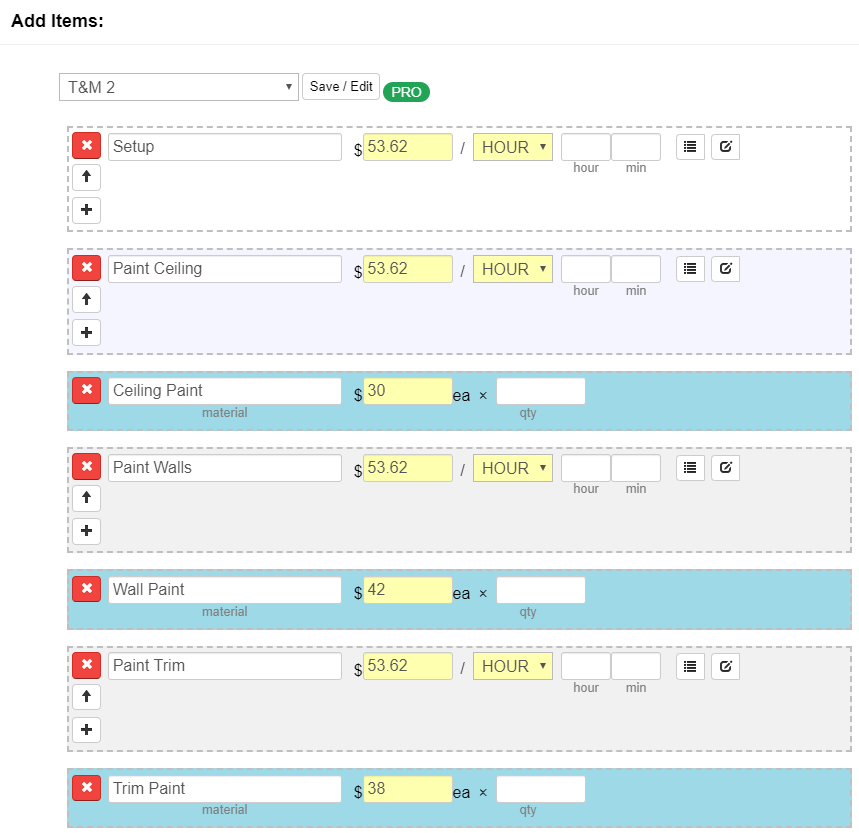
If you like the look of Option A for your presentation, but you want to record materials in a more detailed way on the estimate, you can do that too. Follow the steps above, but add a material line after every labor task, like this:
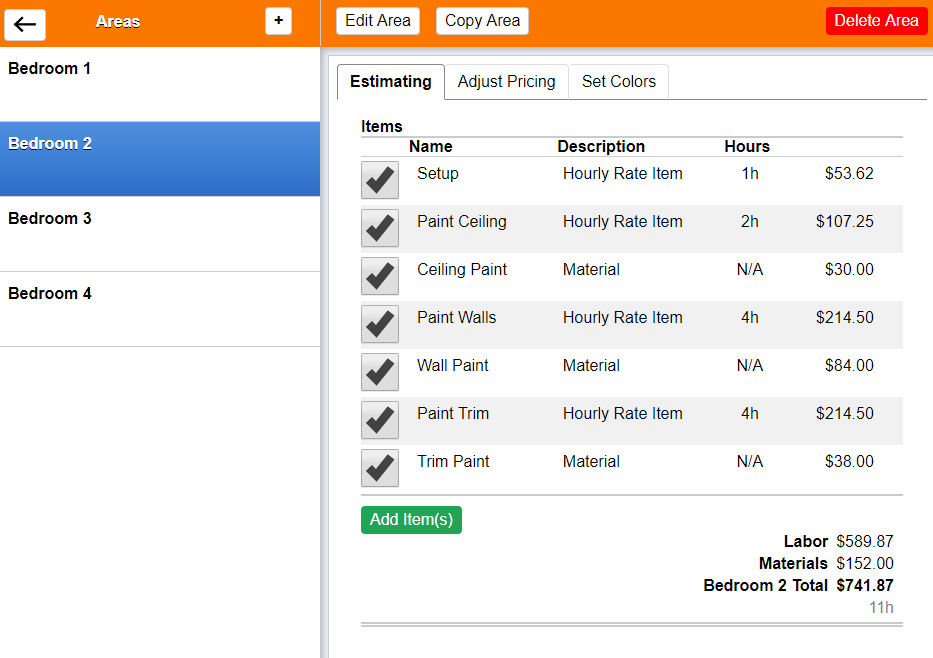
On the estimating screen in PEP, it will look like this:
OPTION B
Estimate will show itemized tasks with materials entered within each line item (using the Materials Library). In a proposal, the materials price will get bundled together in the subtotal.
- Create a Time Form (no materials)
- Click Add “Hourly Task” (e.g. Setup) and enter number of labor hours (e.g. 1 hr)
- Click Add “Hourly Task” (e.g. Paint Ceiling) and enter number of labor hours (e.g. 2 hrs)
- Click Add “Hourly Task” (e.g. Paint Walls) and enter number of labor hours (e.g. 4 hrs)
- Click Add “Hourly Task” (e.g. Paint Trim) and enter number of labor hours (e.g. 4 hrs)
This will give you a labor subtotal (materials subtotal will be $0 at this time).
- Save the form
- Click “Save/Edit” at the top
- Name the form
- Click “Save”
- Your form will be saved to the CHOOSE A FORM drop-down menu for quick access next time.
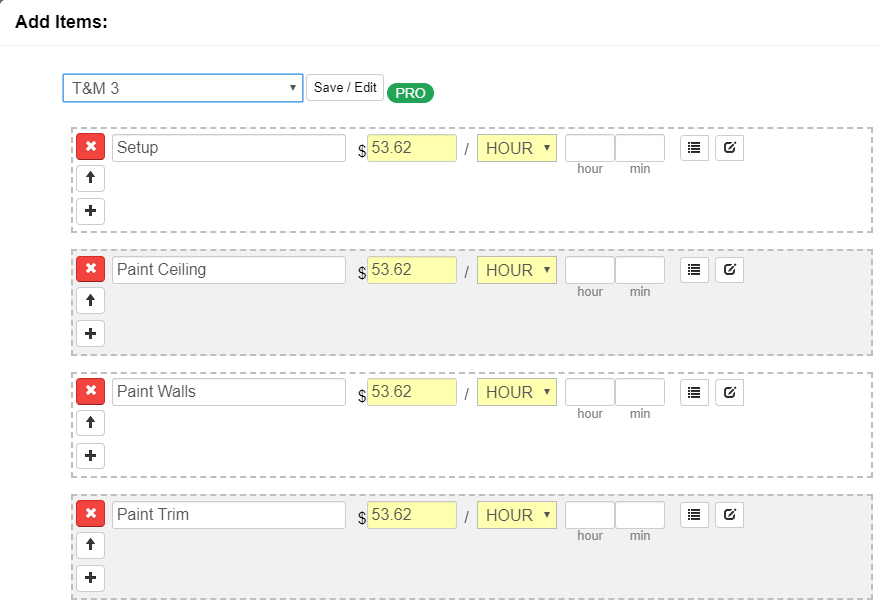
Your form will look something like this:
- Add materials to the items from the materials library
The materials cost pulls from the Materials Library and automatically uses prices set by PEP users with their preferred mark up (no additional calculations needed).
-
- Select a line item (e.g. Paint Ceiling)
- Click “Edit”
- Click “Add Materials”
- Choose a product from the Materials Library drop down menu and enter the number of coats and number of gallons
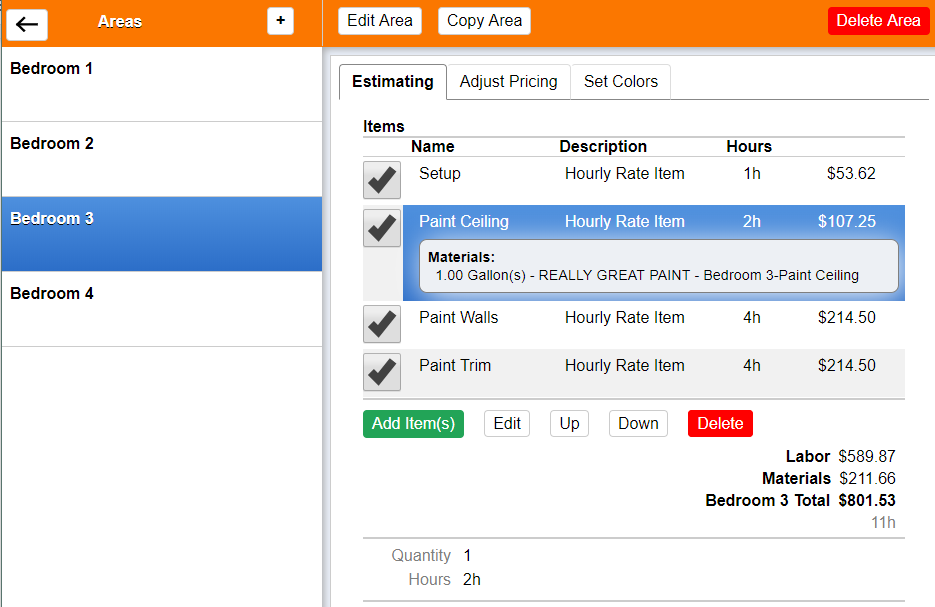
The materials show up within the selected line items. This is more time-consuming but has potential for more accuracy in your materials cost.
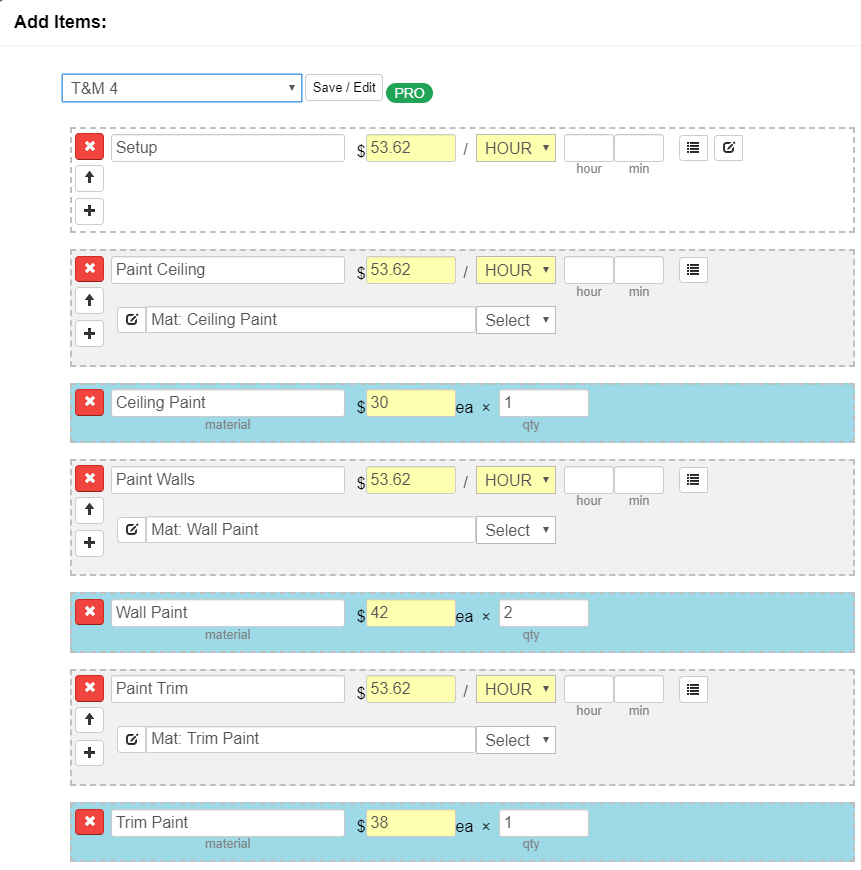
OPTION C
Materials appear itemized in the proposal because you add a note to each task to show the customer what material you’re going to use for each without having to edit every line item to add materials from the materials library.
- Click Add “Hourly Task” (e.g. Set Up) and enter number of labor hours (e.g. 1 hr)
- Click Add “Hourly Task” (e.g. Paint Ceiling) and enter number of labor hours (e.g. 2 hrs)
- Add a note indicating the specific material being used (e.g. Material: ceiling paint)
- Click Add “Material” to add the material and price (per gallon) for the ceiling paint.
Note: When using the Materials line, you want to include the price you want to charge the customer, NOT the price you pay for the material.
- Click Add “Hourly Task” (e.g. Paint Walls) and enter number of labor hours (e.g. 4 hrs)
- Add a note indicating the specific material being used (e.g. Material: wall paint)
- Click Add “Material” to add the material and price (per gallon) for the wall paint.
- Click Add “Hourly Task” (e.g. Paint Trim) and enter number of labor hours (4 hrs)
- Add a note indicating the specific material being used (e.g. Material: trim paint)
- Click Add “Material” to add the material and price (per gallon) for the trim paint.
- Save the edited form
- Click “Save/Edit” at the top
- Name the form
- Click “Save”
- Your form will be saved to the CHOOSE A FORM drop-down menu for quick access next time.
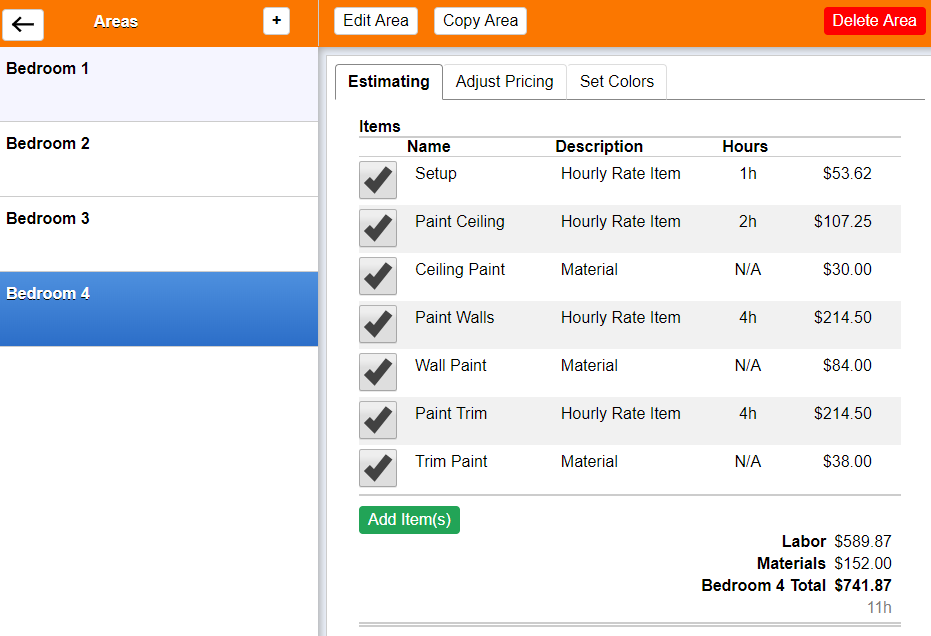
Your form will look something like this:
You won’t see the notes you made when you view the estimating screen in PEP.
___________________________________________
Forms are a flexible tool. Set them up with the tasks you need. Using forms is a great way to establish process for your estimating. We’re diving into forms on the PEP Blog this summer. Next up: building forms with production rates!



Recent Comments